
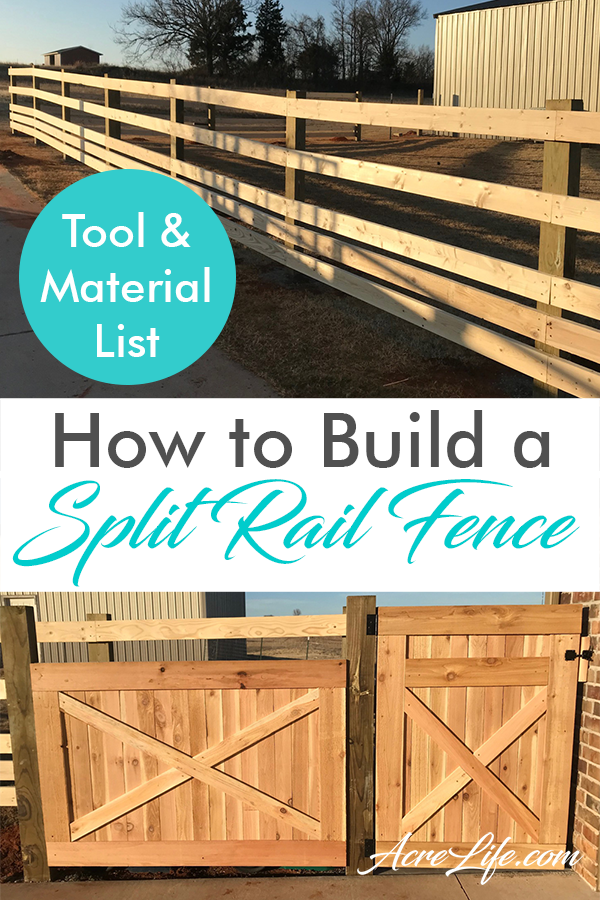
Easy Split Rail Fence
Every time I drive by a house with a split rail fence I look for a horse running in the pasture beyond the fence. I’m never knew why I made the association between the two but apparently a split rail fence is also know as a horse fence. So I guess they are common fences for keeping horses in. We don’t have a horse, but we do have a dog named Bear.
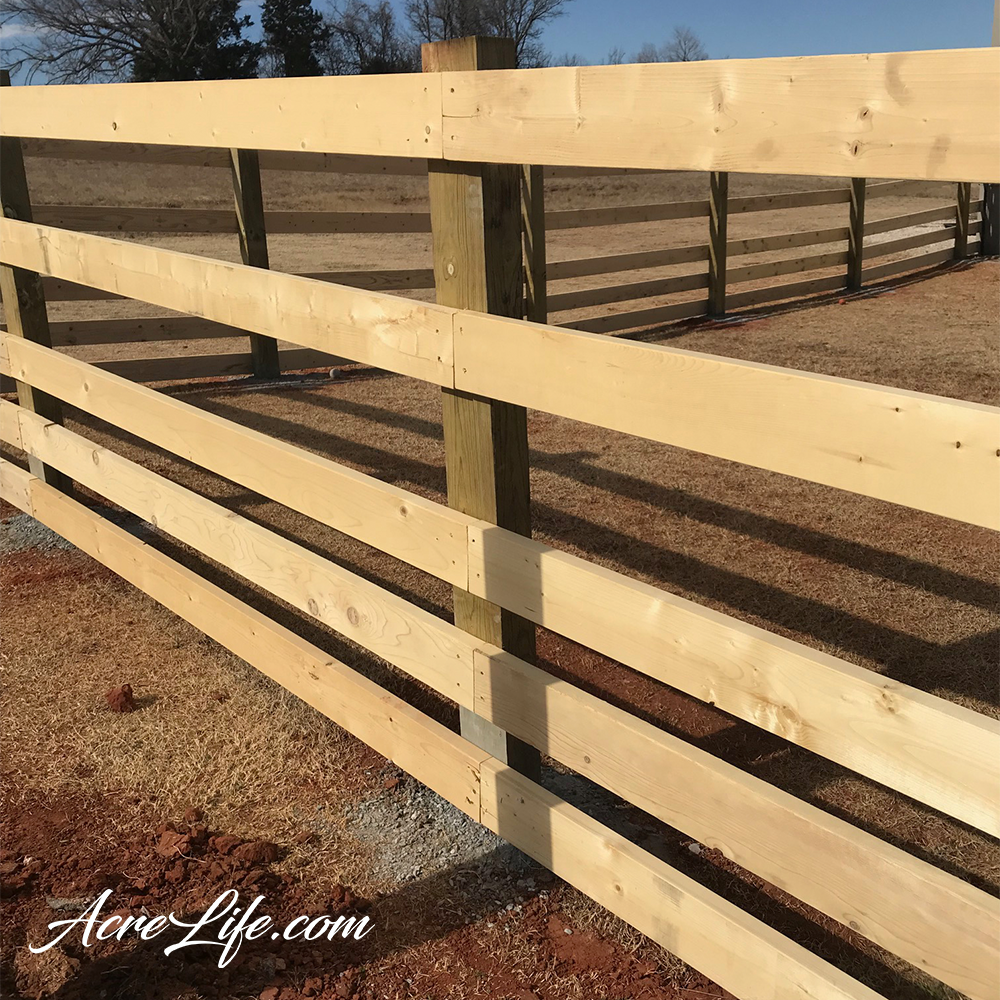
We have a chain link fence that provides a medium sized yard for Bear to play in but he doesn’t have room to run. He really likes to run so we decided to fence in a larger area for him. Since I love the look of a split rail fence, we decided that we would build a one.
Our design is easy to build and looks great. We are novice builders at best so I know that you can build this fence too. The fence that we built runs parallel to our driveway so it is very visible. Therefore we will put some finishing touches on it that aren’t necessary but make it look more expensive than it is.
Materials and Tools
Obviously, the length of fence you need will determine how much material your project will require. The material list below is for an 8-foot section. So you can determine what you will need by multiplying the materials below by the number of 8-foot sections that you are building. We built our fence 5 feet tall which may have been overkill. We decided that we would rather have it too high than to wish that it was taller.
Materials Per 8-Foot Section
- 2 – 4x6x8 Treated Posts
- 5 – 2x6x8 Boards (untreated if you plan to paint or stain)
- 2 – 1x6x8 Cedar Planks
- 20 – 3″ Galvanized Deck Screws
- 2 – 80 lb Quickrete Concrete
Tools
- Compound Miter Saw or Equivalent
- Auger or Post Hole Diggers
- Drill
- String
- 2 to 8 – Stakes (explanation in Step 1)
- Water Hose
- Rebar or Something to mix the concrete
- 100′ Measuring Tape
- 25′ Measuring Tape
- 24″ Level
- Speed Square
- Pencil
- Marking Paint
Step 1 – Preparing the Area
The first step is to determine where you want to build your fence. Check to make sure that there are no utility lines, lateral lines, or any other buried items that will get in the way. Decide if you want your fence to flow with the contour of the land or if you want to level the ground before you begin. We opted to go with the contour of the land because it was easier and cheaper than leveling and I personally think it looks better.
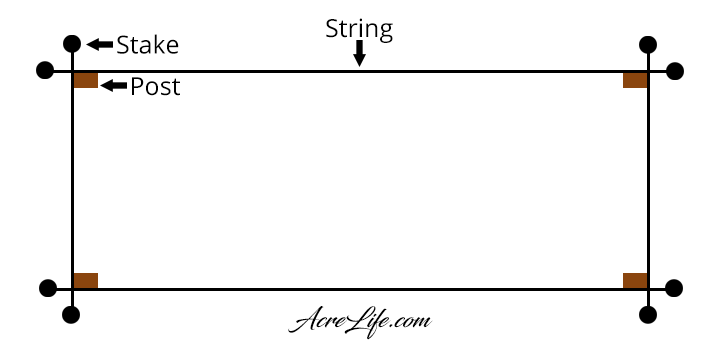
Next, you will mark off your area with the stakes and string. If you are doing a straight fence you will need 2 stakes. For a right angle, you will need 4 stakes. And if you are fencing in a four-sided area and you want to mark the whole thing at once you will need 8 stakes. Follow the diagram below to ensure that your corners form right angles.

Once you have your fence marked off and you have removed any obstacles from the area, you are ready to move to step 2.
Step 2 – Digging the Holes
My biggest piece of advice for every step of the process is to spend time preparing and calculating. It especially goes for this step. If your holes are spaced correctly you will save time and money. You will save time because you won’t have as many boards to cut. And you will save money because you won’t have to go back to the store to buy 10-foot boards. (yep, we had to go back to the store to buy 10-foot boards)
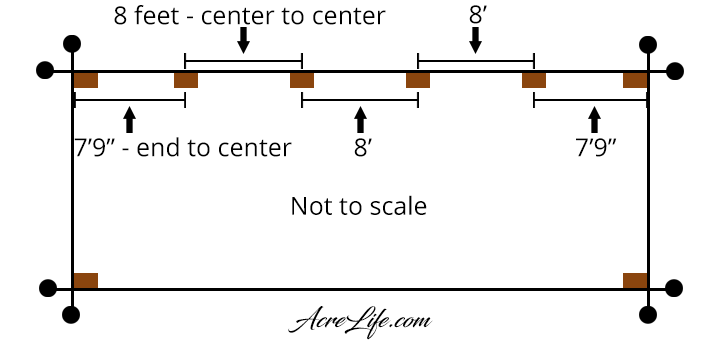
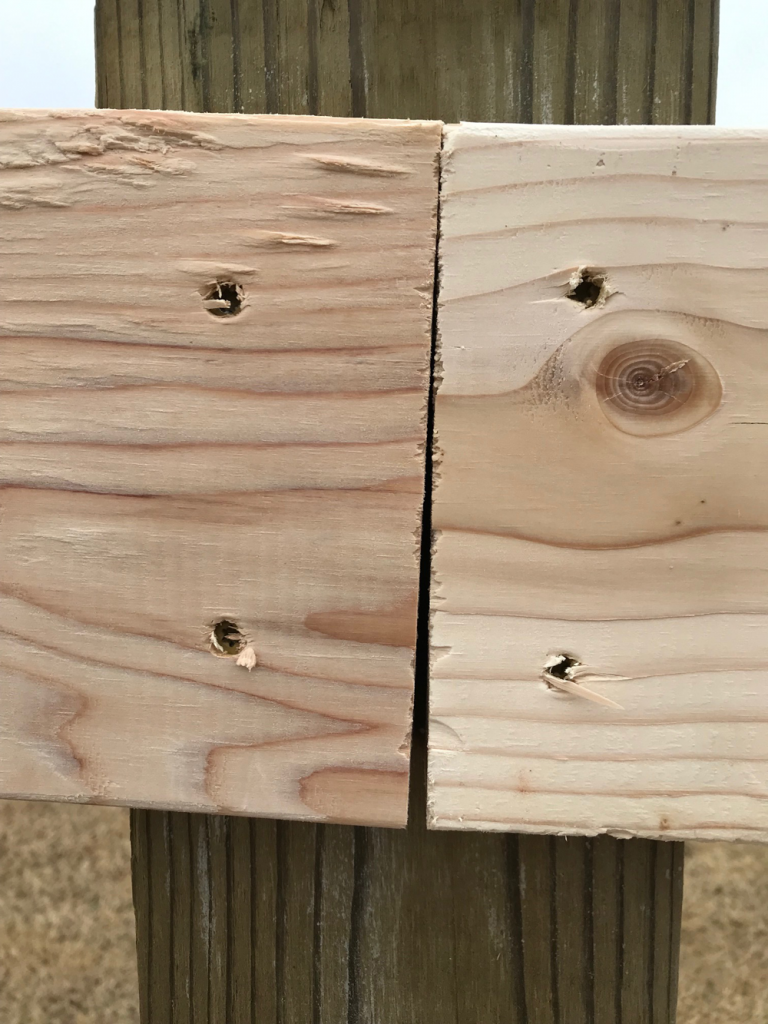
Stretch your 100 foot measuring tape along the string from step 1. Mark a line every eight feet with marking paint for your posts. Check and re-check to make sure that your measuring tape didn’t move. This is the only explanation that I can come up with for why two of our posts were so far off of the 8-foot mark. Keep in mind that the side rail will be flush with the first post and go to the middle of the second post so you will need to move the second post 3 inches closer. All other side rails will attach middle to middle.
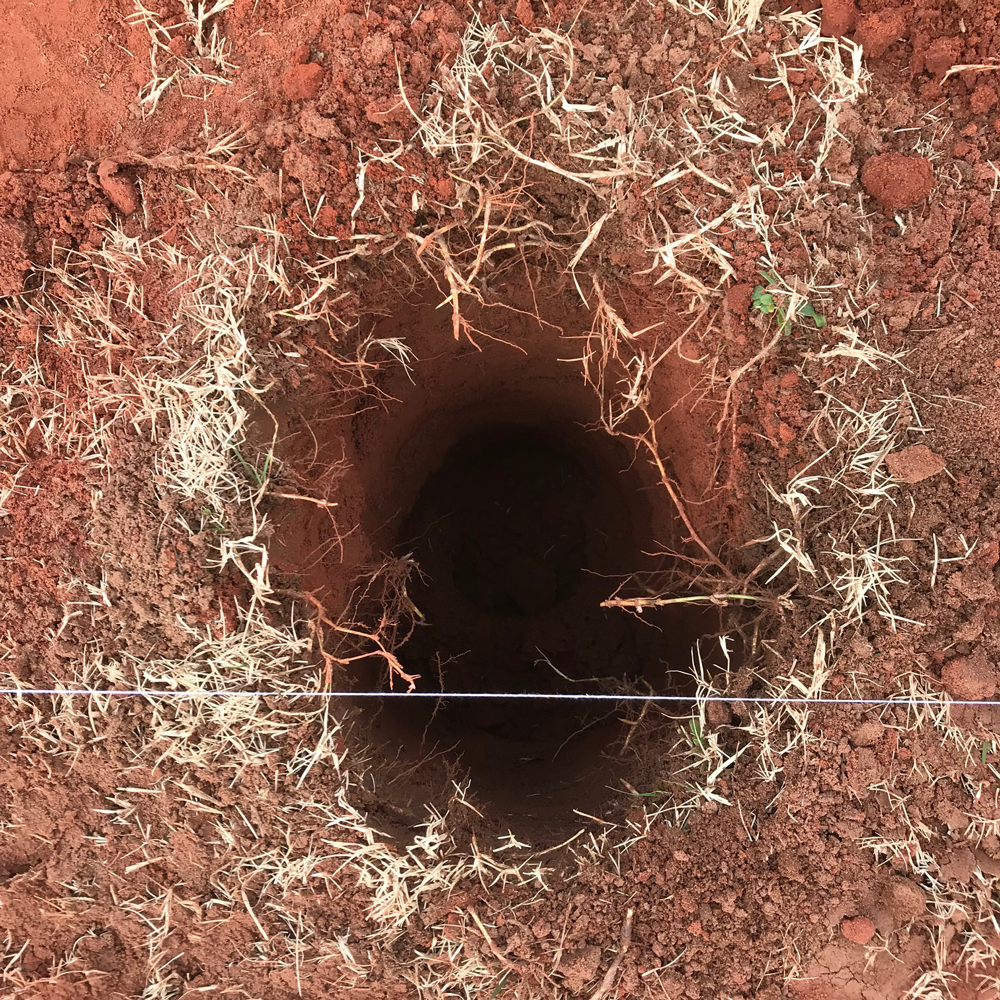
Now it’s time to dig your holes. We got conflicting information about the width of the hole so I’ll tell you what we did because I think it worked great. We rented an 8-inch auger from a local equipment store. This was the first time that we dug our holes with an auger rather than a post hole digger and it made a world of difference. I highly recommend renting one. Ours was $40 for 4 hours or $60 for 24 hours. We finished digging the holes in less than two hours but we kept it for the whole 24 hours because we thought we might dig some holes for other projects.

Using an auger to dig post holes from Acre Life on Vimeo.
Position the tip of the auger two inches off of the line and directly on your 8-foot painted line. This placement should give you plenty of room around the post to pour concrete. If you are using post hole diggers then make sure that you have space all the way around your 4×6 post. If you G how much space you should have you will find that it recommends 3 times the width of your post. That is a huge hole! The experts at Lowe’s said that was overkill and not necessary. If you were building a deck then you would probably need that much concrete but I don’t think so for a fence.

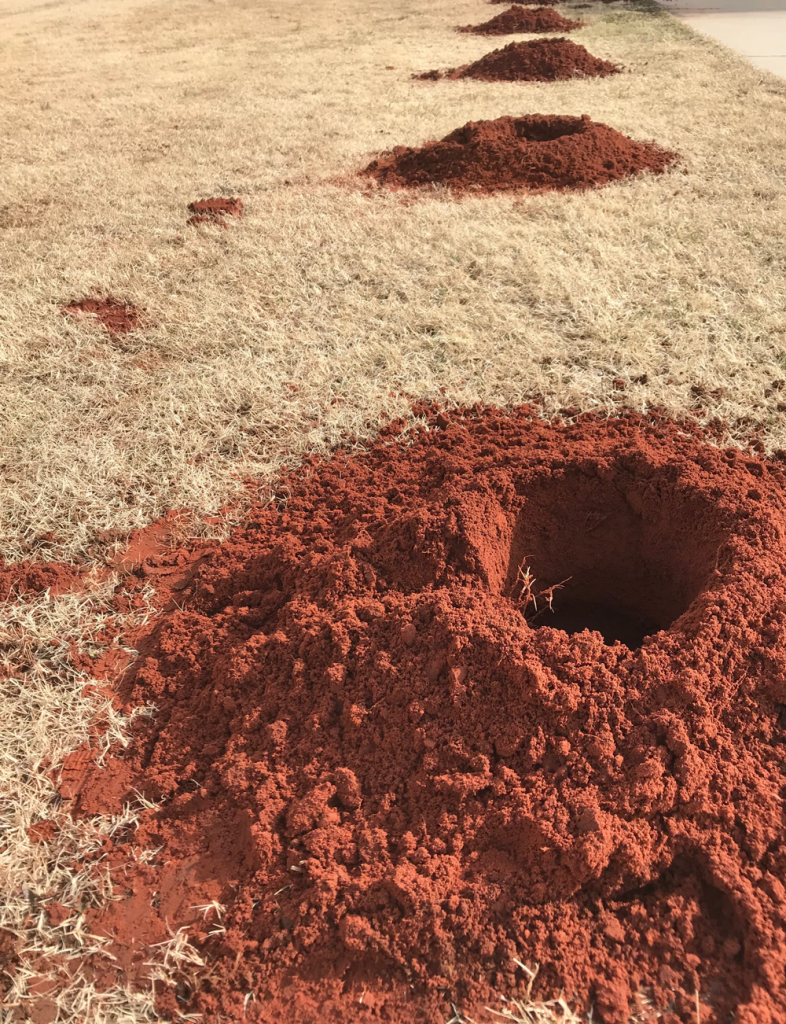
The depth of your hole should be 2-feet if you are doing a 5-foot fence. Google recommends 1/3 to 1/2 the length that is above ground. The more that you have underground, the sturdier you fence will be. The great thing about the 8-inch auger is that it is about 2-feet tall so it was easy to get the correct depth.
Step 3 – Preparing the Posts
This step is important because it creates the structure of your fence. Don’t rush through it! We chose 4x6x8 treated posts for several reasons. 4×4 posts have a tendency to twist over time. 6×6 posts are heavy and expensive. So a 4×6 post seemed perfect. We chose treated wood because there would be 2-feet in the ground and we didn’t want it to rot. Face the 6-inch side toward your string line so that you have a wide base to attach your cross rails.
Be very careful when handling treated wood. Always wear gloves and wash all clothes separately after handling the wood. Wear a mask when cutting treated wood and properly dispose of the saw dust.
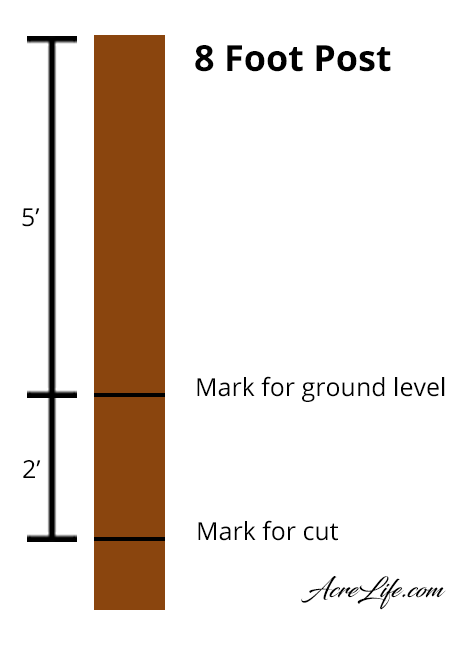
For a 5-foot fence, you will want to bury 2-feet in the ground so you will have to cut off 1-foot. Draw a line at 5-feet so that you will know where the ground level should be. Then draw a line at 7-feet so you will know where to cut. Refer to the diagram below to see my exact measurements because an 8-foot post isn’t exactly 8-feet.

Step 4 – Setting the Posts
Actually, before you set the posts you need to make sure that your holes are still 2-feet deep. We had to come back through several of them with the post hole diggers to scoop out some of the lose dirt that had fallen back into the holes. We also wanted to make sure that the hole was deep enough that we could put a layer of concrete on the bottom of the hole before we set the post in. Doing this extra step will keep water from sitting in the hole and being absorbed by the post.
You will also want to make sure that all of your holes are in line with your string. If not you will need to dig a slightly larger hole to make sure that all of your posts line up. You may also want to double check that the center of your holes 8-feet apart. (yeah, we skipped that part and paid for it in step-5)

When your holes are ready, pour a little concrete into the bottom and add some water. We consulted the Lowe’s experts for this step and they assured us that we did not need to pre-mix the concrete. We actually built our chicken coop run this way and haven’t had any problems. Mix the concrete in the bottom of the hole with a 2-foot piece of rebar or any other tool you have.
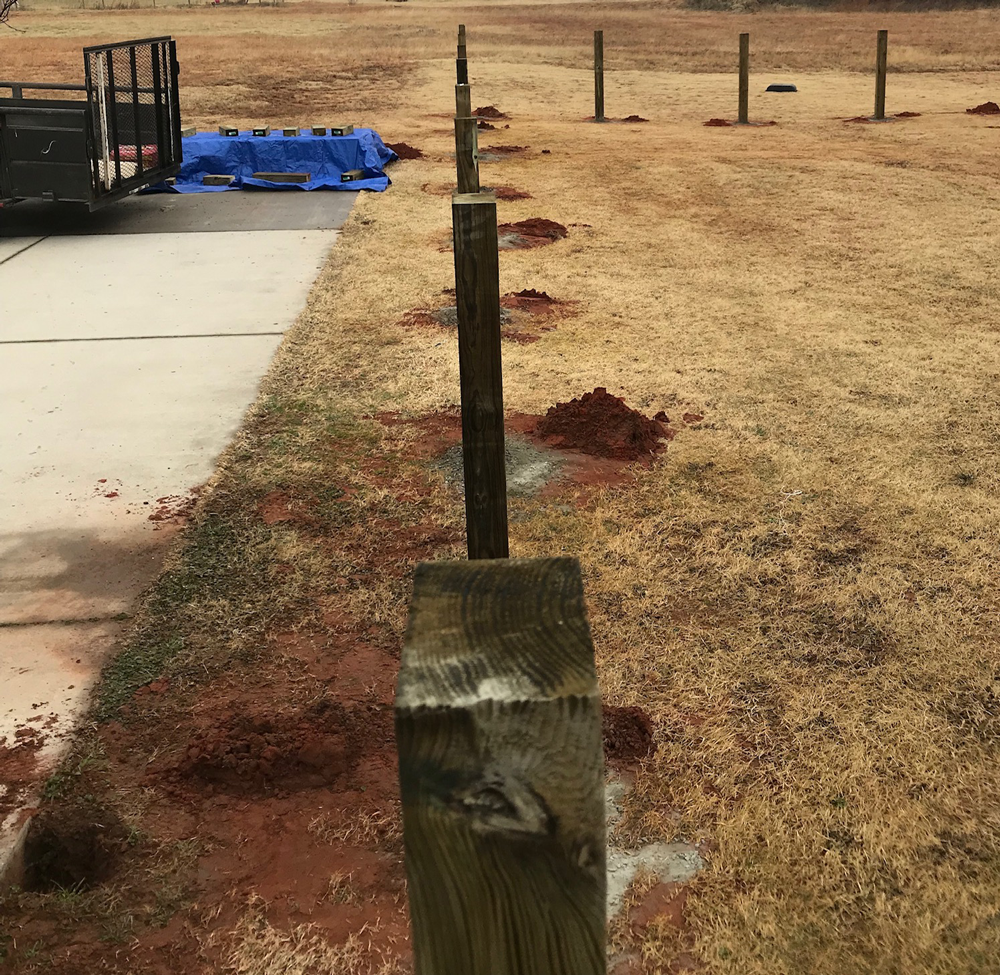
Hopefully, you have a buddy helping you build your fence because two people will make this process go much smoother. Make sure that the post is level side to side and front to back. Also, make sure that the post is touching the line but not pushing on it. And if you are a perfectionist like me, make sure that the line you drew at the 5-foot mark is at ground level. If not you may need to pull the post out and put in more concrete or you may have to pound the post into the ground to lower it.
Once you get the post positioned correctly, hold it in place and have your partner fill the hole halfway up with water. Next fill the hole with concrete almost to the top. Finally, put in more water. You will want to use the rebar to poke holes into the concrete to encourage the water to mix in. The entire time your partner is filling the hole with concrete and water, you should be checking to make sure that the post is still level. Make the small adjustments now while you can.

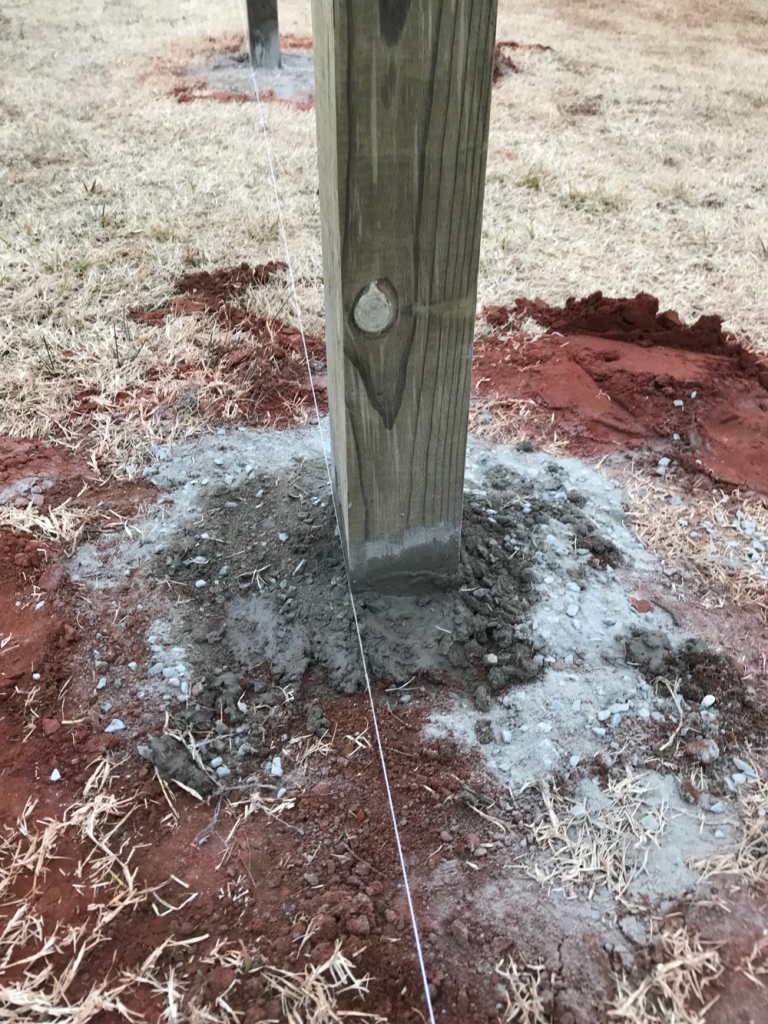
I recommend putting the concrete slightly above ground level so that you avoid having the post come into contact with the soil. This will ensure that your post doesn’t rot over time.

Step 5 – Attaching the Rails
We waited until the next day to attach our side rails to make sure that the concrete was set. If you want to tackle your split rail fence project in one day you can use Quickrete Concrete. It is more expensive so only use it if you plan to add your rails the same day.
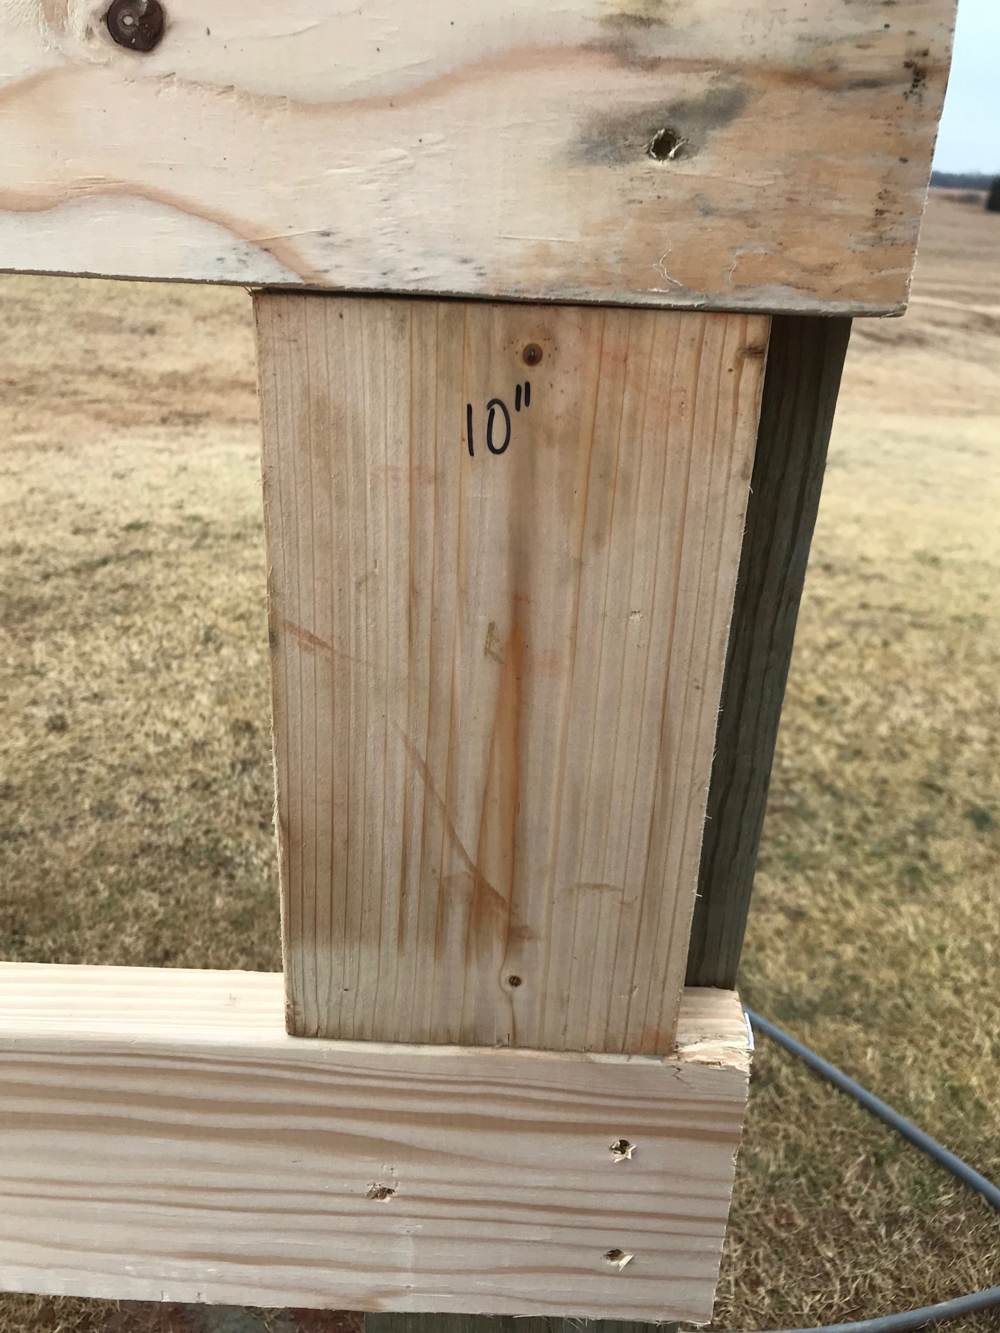
If you were careful and precise with your post placement then this step should go quickly. Decide how much space you want on the top of your post and how much space between each side rail. We left 2 inches at the top and 10 inches between each rail. We then added an extra side rail between the two bottom boards to keep our dog in. Cut a scrap piece of wood each of those distances to use as a guide.
*Update – our dog went right under the bottom rail within 6 minutes of being in the yard! So we moved the bottom 2 boards down. So now there is a 4 inch gap between the two bottom boards.
Start at the top and hold the 2 inch guide flush with the top of the post. Place your first board flush with the end of the post and with the bottom of your guide piece. Put a screw in the top of the board. Move the the other end and line it up and put another screw. Then go back and put a screw in the bottom of each side. Repeat all the way down the fence. Don’t worry if the boards aren’t flush in the middle because you can cover those at the end. If your post holes aren’t perfect (like ours) then you will need to cut some of the boards. They just need to hit somewhere near the middle of each post.
After you get the top row finished, put your 10-inch guide flush against the bottom of the top board and then put a side rail flush up against your guide. Repeat the same method of placing the screws at the top first, and then at the bottom. This step is the easiest because of all of your hard work in the previous steps.

Step 6 – Making it Pretty
I didn’t like seeing all of the seams where the side rails came together. Cover them with a cedar plank to give your fence a finished look. You can either cut the plank to the distance between the top of the first rail and the bottom of the last rail. Or you can cut it to 5-feet so that it covers the entire post. Just make sure that it doesn’t touch the ground to avoid rotting and also to make it easier to run the weed-eater under it.
Screw the plank into the top rail, making sure that it is positioned square with the post. Then move down to the bottom rail and screw into it after checking the the board is level and lined up perfectly with the post. Finish by placing a screw in the third rail down so that you have a screw in every other rail.
After the wood has had a chance to dry out you can paint or stain your fence. I have gotten conflicting information on how long you should wait to paint or stain. Choose the stain you like and read the manufacturers recommendation. Make sure that it has some sort of weatherproofing additive to protect the wood.
If you are trying to figure out if stain or paint is best for your project read about the pros and cons of each. Which Finish Is Best For Your New Wood Fence?
You may also consider some sort of post cap so that water runs off of the post rather than seeping down into the post. Unfortunately, there weren’t any options for 4×6 posts at our local hardware store. But I did find several options online. I chose this plastic cap because of it’s affordability. Here are a few alternative options.
- Make your own out of the 1-foot pieces you cut off of your posts
- Form some tin to nail to the top of the posts
- Cut your posts at an angle before you set them

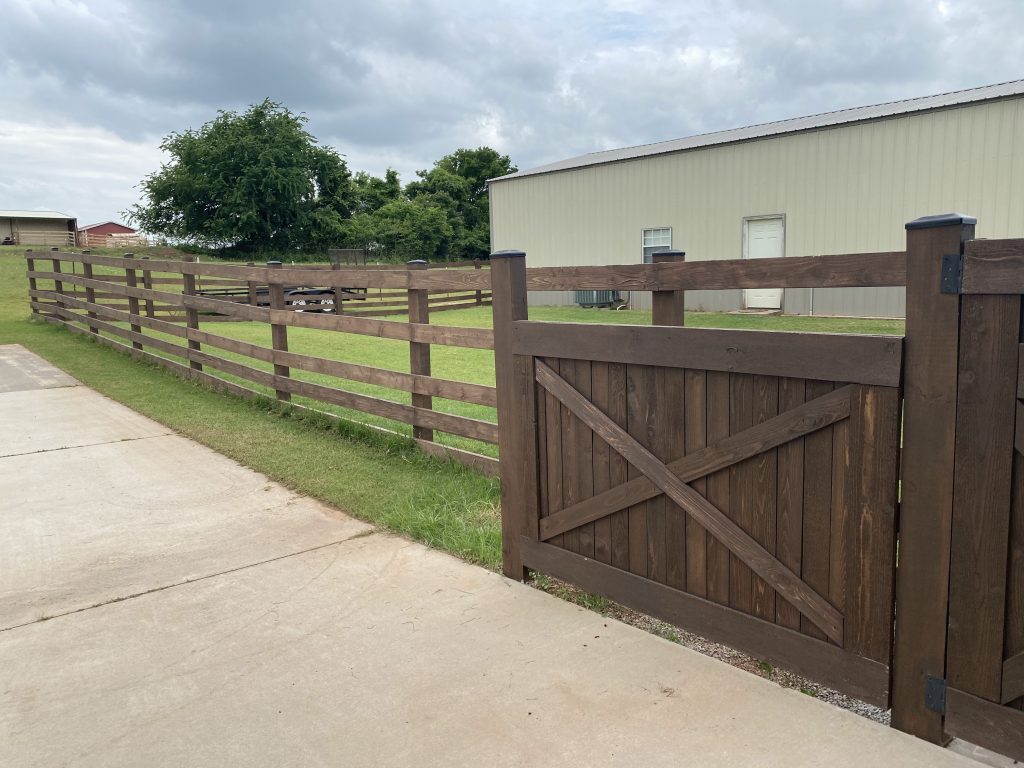
After the Stain 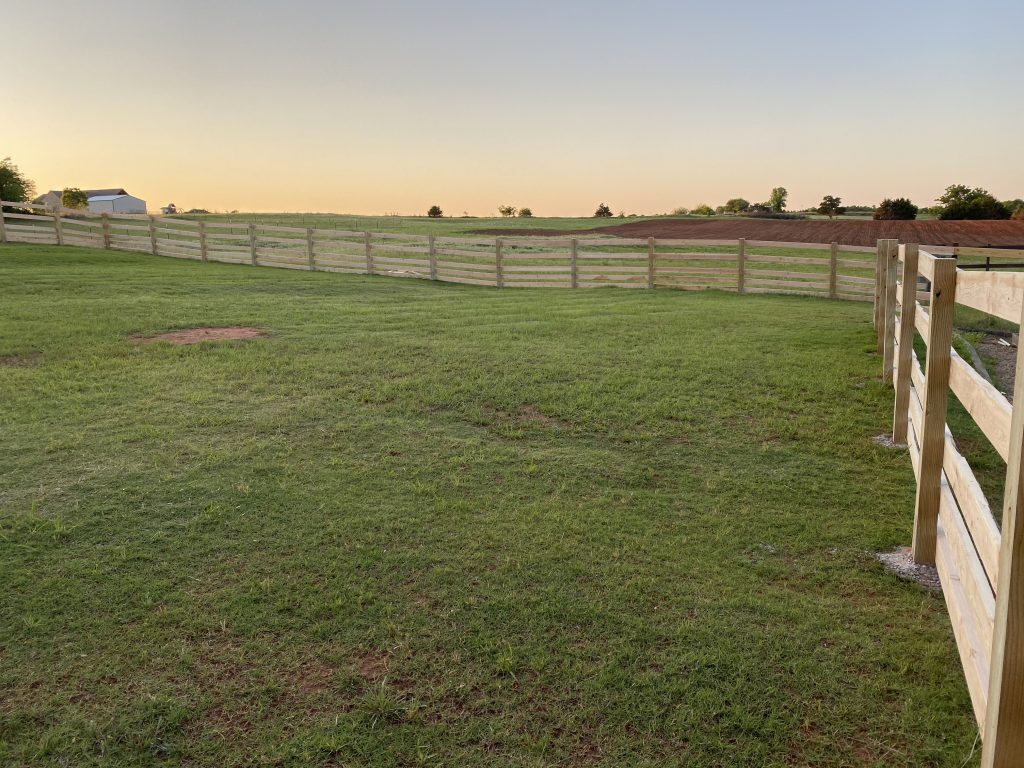
New Section Added in 2020

Other Options
Every split rail fence needs a gate. We built ours out of cedar and 2×4 studs. You can read about the steps for building our gate here.
We considered putting welded wire fencing behind the fence to keep our dog in and predators out. But then we changed our minds and opted for that extra board at the bottom instead. Many people add the welded wire between the posts and the side rails.
We also added a solid fenced area to keep our trash cans easily accessible but hidden. You can read about the steps for building it here. (coming soon)
I would love to see completed pictures of your split rail fence. Leave them in the comments below.


Should it be 7’9″ from center of first post to center of second post, giving you 8’0″ from end to center on the first section?
That is correct! You can see that in the diagram above. You will want to make sure that you have all of your measurements as exact as possible so that you waste less material, money and time.